| Getting Started with WordStock |
Standard WordStock Reports
WordStock provides standard Report Formats based on the Report Formats most commonly used by WordStock stores. A WordStock standard Report Format can be applied to all of the records in a data file, or to a pre-sorted group of records within a data file. WordStock is equipped with pre-formatted report designs for the following reports:
- Restocking Report of your Inventory file
- Item List for a customer based on your Inventory file
In addition, WordStock provides a standard Report Format for core data files:
- Basic Inventory report
- Vendor report
- Product report
- Section report
- Special Order Report
- Customer Report
WordStock also contains a Cost of Inventory report that estimates the monetary value of your store's inventory and gross margin for sales at any given time.
The Restocking Report
A Restocking Report is based on the Restock Quantity ("Rst Qty") field on the Inventory Screen. Whenever you sell an item, the number in the Restock Quantity field for that record is increased by one. WordStock is equipped with a Sort Include Specification that sorts through the quantities in the Restock Quantity fields of all your Inventory records and reports on any changes. The Restocking Report is an interval report. It is a list of general information about every item that you have sold since the last time you ran a Restocking Report. Once you run a Restocking Report, you can:
- Print the Restocking Report.
- View the Restocking Report on screen to determine what to order or return.
- Put all items with Restock Quantities on a PO.
| Hint We recommend that you run a Restocking Report at the end of each day so that you can see a list of every item that was sold, and to identify trends in your store. |
Printing a Restocking Report
| Please Note In order to generate a Restocking Report, you must have created a Sort Include Specification (Chapter 7a) and a Sort Order Specification (Chapter 7a). |
1. Use the keyboard arrow method or the hot key method to select 'Reports' from the Main Menu. The Reports sub-menu is opened, and 'Sort a data file' is highlighted.
2. Select 'WS Reports sorted records'. The WS Reports sorted records sub-menu is opened.
3. Select 'Restocking'. The SORT THE INVENTORY program is opened and your Include Specifications Menu box is displayed. See Figure 719 below.
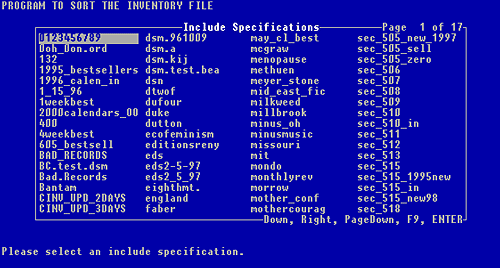
Figure 7-19, sample Include Specifications menu box
4. Use the keyboard arrows to select 'RESTOCK', and press <Enter>. Your Order Specifications Menu box is displayed. See Figure 720 below.
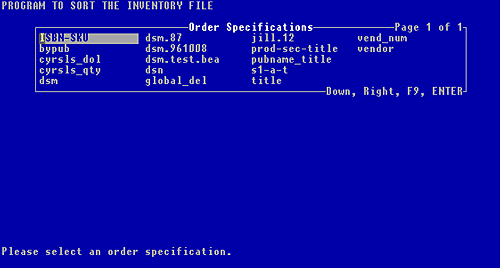
Figure 7-20, sample Sort Order Specifications menu box
5. Use the keyboard arrow method to select a Sort Order Specification. You are notified that WordStockis 'Sorting the INVENTORY file.'. After a brief delay, the PROGRAM TO PRINT A RESTOCKING REPORT is opened.
6. Make sure that your printer is turned on and that it is loaded with paper.
7. If there is more than one printer in your store: You are asked if you want to use your default printer. Press <y> and press <Enter> to select your main printer. OR Press <n> and press <Enter> to display a list of your printers and select a printer from the list.
If there is only one printer in your store: After a brief delay, you are notified that the printing is done, and asked 'Did the Restocking Report print successfully?'.
8. Check the Restocking Report: If the report printed successfully, press <y>. If the report did not print successfully, press <n> and repeat steps 7 and 8 until the report prints successfully. You are asked 'Do you want to clear the restock quantities?'.
| Please Note When you clear the Restock Quantities, the restock fields for all the records in the sort are reset to zero, and the restock quantities begin re-accumulating. |
9. If you want to clear the report so that the restock quantities begin accumulating again, press <y>. After a brief delay you are notified that the 'Restock quantities were cleared successfully'.
If you want a printout of the Restock report but do not want to clear the restock values, press <n>. 'Restock quantities not cleared.' is displayed. You are prompted to 'Press <Enter> to return to the menu'.
10. Press <Enter>. The Main Menu is displayed with the Reports and the WS Reports sorted records sub-menus opened.
Viewing the Restocking Report on the Screen
Once you have generated a Restocking Report, you can view sort output on the screen before printing it or instead of printing it. Viewing the Restocking Report on the screen has two major advantages over printing it:
1. When you view the Restocking Report on the screen, the entire Inventory record of each item in the sort is displayed on the screen individually according to your Sort Order Specification.
2. When you view the Restocking Report on the screen, you can scroll through all the records in the sort and add some or all of the items to a PO.
1. Use the keyboard arrow method or the hot key method to select Reports from the Main Menu. The Reports sub-menu is opened and 'Sort a data file' is highlighted.
2. Select 'View restocking sort on screen'. The PROGRAM TO LOOK AT SORT OUTPUT ON SCREEN' is displayed, and you are prompted to 'Enter # of weeks supply to recommend:'.
| Hint When you enter the number of weeks' supply to recommend, you are telling WordStock the number of weeks supply for which you would like it to calculate (expressed in the number of each item it thinks you should order or return). |
3. Type the number of weeks for which you want the recommended supply to last, and press <Enter>. WordStock will calculate a recommended supply quantity for each ISBN/SKU on the Inventory Report. You are asked 'Do you wish to enter default PO information?', and 'Y' is entered by default.
4. If you want to create or specify a single default PO, press <Enter>. You are prompted to 'Enter a default PO number:', and 'NEW' is Entered by default. Otherwise, press <n> and press <Enter>.
The Inventory record of the first item in the sort is displayed.
The Message: box displays which record in the Sort Output is displayed. The "Rec" field in the lower right corner of the screen displays the recommended order quantity.
The cursor is flashing in the Command: box. You can now add the items from the Sort Outcome to a PO. Follow the directions under 'ADDING A SORTED RECORD TO A PO.
5. If you want WordStock to assign a new PO#, press <Enter>. If you want to assign a new PO #, type <apo> and press <Enter>. You are prompted to 'Enter PO# to create:' Type the PO#, and press <Enter>.
If you want to add the items to an existing PO, type the PO# and press <Enter>. A PO Qty Types Menu box is opened and you are prompted to 'Select a PO Qty type'.
| Please Note When you select a PO Quantity Type you are telling WordStockhow to determine the quantity for each item on the PO. |
6. Select a PO Quantity Type:
Select 'User Entered' if you want to manually select the quantity for each item separately.
Select 'Restock' if you want to use the restock quantity (from the sort output) for every item.
Select 'Recommended' if you want to use the recommended quantity derived from step 3.
Select 'Default Value' if you want to select a default quantity to apply every item. Type the default quantity when prompted.
WordStock is now ready to receive PO header information. (Please see Chapter 8 Ordering for information about headers).
The PO number is 'TBA'(To Be Announced once the PO header is complete). The cursor is flashing in the "Vendor #" field.
7. Type the Vendor number of the Vendor with whom you are placing the order, and press <Enter>. The " Vendor name", the "Type" (PO type) and the "CM" (costing method) are automatically retrieved from the Vendor file, and the cursor is flashing in the "Type" field.
8. To accept the default PO type, press <Enter>. To change the PO type, type a PO type and press <Enter> The cursor is flashing in the "CM" (costing method) field.
9. To accept the default costing method, press <Enter>. To change the costing method, type the costing method and press <Enter>. The cursor is flashing in the "Date" field, and the current date is displayed.
10. To accept the current date, press <Enter>. To change the date, type the date (MM/DD/YY) and press <Enter>. The cursor is flashing in the "Disc" field.
11. If you want to apply a blanket discount to the PO, press <Enter>. Otherwise, type the discount percentage (four digits to accommodate a decimal point) and press <Enter>. The cursor is flashing in the "SpecInd" (Special Indicator) field.
12. If you want every item on the PO to be marked as a Special Order, press <y> and press <Enter>. Otherwise, press <n> and press <Enter>. You are prompted to Press '<F8> to QUIT (no save) or <F10> to CONTINUE (save).'.
13. To save the PO header information, press <F10>. The PO header information is displayed, and the PO# is inserted. You are prompted to 'Press <Enter> to view sort'.
To return to the Main Menu without saving the PO header information, press <F8>. You are prompted to 'Press <Enter> to return to the menu'. Press <Enter>. The Main Menu is displayed with the Reports sub-menu opened.
14. Press <Enter>. The Inventory record of the first item in the sort is displayed. The Message: box notifies you which record in the Sort Output is displayed.
The "Rec" field in the lower right corner of the screen displays the recommended order quantity.
The cursor is flashing in the Command: box. You can now add the items form the Sort Output to the PO. Follow the directions under ' ADDING A SORTED RECORD TO A PO', below.
| Please Note The "Rec" field in the lower right corner of the screen displays the recommended supply quantity from step 3. If the "Rec" field displays a positive number, WordStock 4 recommends that you order the quantity indicated. If the "Rec" field displays a negative number, WordStock 4 recommends that you return the quantity indicated. A zero (0) followed by a question mark in the "Rec" field indicates that there is insufficient historical data on which to base a recommendation. A number other than zero followed by a question mark in the "Rec" field indicates that although there is enough historical data on which to base a recommendation, the item has been out of stock for too many of the past twelve weeks for the recommended quantity to be accurate. |
Quitting out of the Restocking Report
1. Press <q> and press <Enter>. You are asked 'Do you really want to quit?', and 'N' is Entered by default.
2. If you really want to quit, press <y> and press <Enter>; otherwise, press <Enter>.
'Clear out of stock indicator for items in sort?' is displayed, and 'N' is Entered by default.
The cursor is flashing in the Command: box. You can scroll through the records in the sort or add items to a PO.
| Please Note The out of stock indicator is a hidden field in the Inventory record. When you sell the last one of an item at the POS, WordStock puts an asterisk (*) in the out of stock field. |
You can then identify all items that are out of stock by sorting your Inventory file for "OOS (out of stock) equals (is) * (asterisk).
The *(out of stock indicator) STAYS IN THE INVENTORY RECORD even if you receive more copies of the item (the item is no longer out of stock) UNTIL YOU CLEAR the out of stock indicator.
3. If you want to clear the out of stock indicator for the items in the sort:
Otherwise, press <Enter>. Press <y> and press <Enter>. 'Clear restock value for items in sort?' is displayed.
| Please Note When you clear the Restock values, the restock fields for all records in the sort are reset to zero, and the restock quantities begin re-accumulating. |
4. If you want to clear the restock value for the items in the sort, press <y> and press <Enter>. Otherwise, press <n> and press <Enter>.
The number of the last item in the Sort Order that you viewed is displayed, and you are prompted to 'Press <Enter> to return to the menu'.
5. Press <Enter>. The Main Menu is displayed with the Reports sub-menuopened.
The Standard Inventory Report
A Standard Inventory Report is a printout of every Inventory record in a Sort Output (your Sort Include and Sort Order Specifications). The Standard Inventory Report Format provides a broad historical overview of all the fields in every Inventory record in the Sort Output.
| Hint It is a good idea to generate a Standard Inventory Report if you want to keep a hard copy of your Inventory records prior to doing a global deletion. |
Printing a Standard Inventory Report
| Please Note In order to print a Standard Inventory Report, you must have created a Sort Include Specification (Chapter 7a) and a Sort Order Specification (Chapter 7a). |
1. Make sure that your printer is turned on and that it is loaded with paper.
2. Use the keyboard arrow method or the hot key method to select 'Reports' from the Main Menu. The Reports sub-menu is opened, and 'Sort a data file' is highlighted.
3. Select 'Print standard Inventory report'. The PROGRAM TO PRINT AN INVENTORY REPORT is opened and your Inventory Sort Output List Menu box is displayed. See Figure 721 below.

Figure 7-21, sample Inventory Sort Output List menu box
4. Use the keyboard arrows to select an Inventory Sort Output and press <Enter>. If there is more than one printer in your store, a pop-up menu of your printers is displayed. Use the keyboard arrows to select a printer and press <Enter> . If there is only one printer in your store, you are prompted to enter a title for the report.
5. Type a name for the report (up to 60 characters) and press <Enter>. (The name that you enter will appear as the title of the report, but will not be saved in your system.) You are notified that the report is printing and, after a brief delay, that the printing is done. You are prompted to 'Press <Enter> to return to the menu'.
6. Press <Enter>. The Main Menu is displayed with the Reports sub-menu opened.
Viewing an Inventory Sort on the Screen
Once you have generated an Inventory Sort Output, you can view the Sort Output on the screen before (or instead of) printing a Standard Inventory Report. Viewing an Inventory Sort Output on the screen has two major advantages over printing a Standard Inventory Report:
When you view an inventory sort on the screen, the entire Inventory record of each item in the sort is displayed on the screen individually according to your Sort Order Specification so you can review pertinent information.
When you view an Inventory sort on the screen you can scroll through all the records in the sort and add some or all of the items to a PO and/or a Return Order ( RO).
| Please Note In order to in order to view an Inventory Sort on the screen, you must have created a Sort Include Specification (Chapter 7a) and a Sort Order Specification (Chapter 7a). |
1. Use the keyboard arrow method or the hot key method to select ' Reports' from the Main Menu. The Reports sub-menu is opened, and 'Sort a data file' is highlighted.
2. Select 'View Inventory sort on screen'. The PROGRAM TO VIEW INVENTORY SORT ON SCREEN is opened and your Inventory Sort Output List Menu box is displayed. See Figure 722 below.

Figure 7-22, sample Inventory Sort Output List menu box
3. Use the keyboard arrows to select to select an Inventory Sort Output and press <Enter>. You are prompted to 'Enter # of weeks supply to recommend'.
| Hint When you Enter the number of weeks' supply to recommend, you are telling WordStock the number of weeks supply for which you would like it to calculate (expressed in the number of each item it thinks you should order or return). |
4. Type the number of weeks for which you want the recommended supply to last, and press <Enter>.
WordStock will calculate a recommended supply quantity for each ISBN/SKU on the Inventory Report. You are asked 'Do you wish to Enter default PO information?', and 'Y' is Entered by default.
5. If you want to create or specify a single default PO, press <Enter>. You are prompted to 'Enter a default PO number:', and 'NEW' is Entered by default.
Otherwise, press <n> and press <Enter>.
You are asked 'Do you wish to Enter default Return information?'
Skip to step 15.
6. If you want WordStock to assign a new PO#, press <Enter>.
If you want to assign a new PO #, type <apo> and press <Enter>. You are prompted to 'Enter PO# to create:'. Type the PO#, and then press <Enter>.
If you want to add the items to an existing PO, type the PO# and press <Enter>.
A PO Qty Types Menu box is opened and you are prompted to 'Select a PO Qty type'.
| Please Note When you select a PO Quantity type you are telling WordStock how to determine the quantity for each item on the PO. |
7. Select a PO Quantity Type:
Select 'User Entered' if you want to Enter the quantity for each item separately.
Select 'Restock' if you want to use the restock quantity (from the Sort Output) for every item.
Select 'Recommended' if you want to use the recommended quantity derived from step 3.
Select 'Default Value' if you want to Enter a default quantity to apply to every item.
You are prompted to 'Enter default order quantity:'. Type the default quantity and press <Enter>. WordStock is now ready to receive PO header information. (Please see Chapter 8 Ordering for information about headers).
The PO number is 'TBA' (To Be Announced once the PO header is complete). The cursor is flashing in the "Vendor #" field.
8. Type the Vendor number of the Vendor with whom you are placing the order, and press <Enter>.
The "Vendor name" ,the "Type" (PO type) and the "CM" (costing method) are automatically retrieved from the Vendor file, and the cursor is flashing in the "Type" field.
9. To accept the default PO type, press <Enter>. To change the PO type, type a PO type and press <Enter> The cursor is flashing in the "CM" (costing method) field.
10. To accept the default costing method, press <Enter>. To change the costing method, type the costing method and press <Enter>. The cursor is flashing in the "Date" field, and the current date is displayed.
11. To accept the current date, press <Enter>. To change the date, type the date (MM/DD/YY) and press <Enter>. The cursor is flashing in the "Disc" field.
12. If you want to apply a blanket discount to the PO, press <Enter>. Otherwise, type the discount percentage (four digits to accommodate a decimal point) and press <Enter>. The cursor is flashing in the "SpecInd" (Special Indicator) field.
13. If you want every item on the PO to be marked as a Special Order, press <y> and press <Enter>. Otherwise, press <n> and press <Enter>. You are prompted to 'Press <F8> to QUIT (no save) or <F10> to CONTINUE (save)'.
14. To save the PO header information, press <F10>. You are asked 'Do you wish to Enter default Return information?' and "Y" is Entered by default.
To return to the Main Menu, press <F8>. You are prompted to 'Press <Enter> to return to the menu'. Press <Enter>. The Main Menu is displayed with the Reports sub-menu opened.
15. If you want to create or specify a single default Return Order, press <y> and press <Enter>. You are prompted to 'Enter a default Return number:'
Otherwise, press <n> and press <Enter>. The Inventory record of the first item in the sort is displayed.
The Message: box notifies you which record in the Sort Output is displayed. The "Rec" field in the lower right corner of the screen displays the recommended order quantity.
The cursor is flashing in the Command: box. You can now scroll through the records and add the items form the Sort Outcome to a PO or a Return Order.
Follow the directions under 'ADDING A SORTED RECORD TO A PO' below, or 'ADDING A SORTED RECORD TO A RETURN ORDER' below.
| Please Note The "Rec" field in the lower right corner of the screen displays the recommended supply quantity from step 3.
A number other than zero followed by a question mark in the "Rec" field indicates that although there is enough historical data on which to base a recommendation, the item has been out of stock for too many of the past twelve weeks for the recommended quantity to be accurate. |
16. If you want WordStock to assign a new Return Order#, press <Enter>.
If you want to assign a new Return Order #, type <art> and press <Enter> key. You are prompted to 'Enter RO# to create:'.
If you want to add the items to an existing Return Order, type the RO# and press <Enter>. Type the RO#, and press <Enter>.
A Return Qty types Menu box is opened and you are prompted to 'Select a RO Qty type'.
| Please Note When you select a Return Qty type you are telling WordStockhow to determine the quantity for each item on the Return Order. |
17. Use the keyboard arrow method or the hot key method to select a Return Qty type.
Select 'User Entered' if you want to Enter the quantity for each item separately.
Select 'OnHandQty' if you want to return the entire on hand amount of each item.
Select 'Recommended' if you want to use the recommended quantity derived from step 3.
Press <Enter>.
WordStock is now ready to receive Return header information. (Please see Chapter 10 Returns to the Vendor for information about headers).
The "Return #" is 'TBA' (To Be Announced once the Return Order header is complete). The cursor is flashing in the "Vendor #" field. The cursor is flashing in the "Vendor #" field.
18. Type the Vendor number of the Vendor to whom you are returning the items, and press <Enter>. The "Vendor name" is automatically retrieved from the Vendor file, the cursor is flashing in the "Date" field, and the current date is automatically Entered.
19. To accept the current date, press <Enter>. To change the date, type the date and press <Enter>. The cursor is flashing in the "Disc" field.
20. If you want to apply a blanket discount to the Return Order, press <Enter>. Otherwise, type the discount percentage (expressed as a four digit number to accommodate a decimal point) and press <Enter>. The cursor is flashing in the "DelInd" (Delete Indicator) field
21. If you want the Inventory record of every item on the Return Order to be deleted from your Inventory file, press <y> and press <Enter>. Otherwise, press <n> and press <Enter>. You are prompted to 'Press <F8> to QUIT (no save) or <F10> to CONTINUE (save)'.
22. To save the RO header information, press <F10>. The Return Order header information is saved.
To continue without saving the Return Order header information, press <F8>.
You are prompted to 'Press <Enter> to view sort'.
| Hint We recommend that you jot down the PO number and/or the Return Order number for future reference. |
23. Press <Enter>. The Inventory record of the first item in the Sort Output is displayed and the cursor is flashing in the Command: box. The Message: box notifies you which record in the sort is displayed. You can now press <Enter> to scroll through the records in the Sort Output, and add all or some of the items to a PO or a Return Order.
Follow the directions under 'ADDING A SORTED RECORD TO A PO', or 'ADDING A SORTED RECORD TO A RETURN ORDER'.
| Please Note The "Rec" field in the lower right corner of the screen displays the recommended supply quantity based on the number of weeks' supply you asked WordStock 4 to recommend.
A number other than zero followed by a question mark in the "Rec" field indicates that although there is enough historical data on which to base a recommendation, the item has been out of stock for too many of the past twelve weeks for the recommended quantity to be accurate. |
Adding a Sorted Record to a Purchase Order
| Please Note You must have a sorted record displayed on the screen in order to add a sorted record to a PO. |
1. With the cursor flashing in the Command: box of a sorted record, press <p> or the <F8> key. You are prompted to 'Please Enter the PO# to add the sort record to:'
If you created or specified a default PO for this sort: Your default PO# is displayed.
If you did not create a default PO for this sort: 'NEW' is Entered by default. Skip to step 3.
2. If you want to add the item to the default PO that you just created or specified: Press <Enter>.
If you want to add the item to a different PO: Skip to step 3.
If the PO Quantity Type you selected is 'Restock': Skip to step 13.
If the PO Quantity Type you selected is 'Recommended': Skip to step 15.
If the PO Quantity Type you selected is 'Default Value': You are prompted to 'Please Enter the quantity to order:', and the default value is displayed. Skip to step 17.
If the PO Quantity Type you selected is 'User Entered': You are prompted to 'Please Enter the quantity to order:' Skip to step 18.
3. If you want WordStock to assign a new PO#: Type <new> and press <Enter>.
If you want to assign a new PO #: Type <apo> and press <Enter>. You are prompted to 'Enter a PO#'. You are prompted to 'Please Enter Vendor# for the PO:'. Skip to step 5.
If you want to add the items to an existing PO: Type the PO# and press <Enter>. You are prompted to 'Please Enter Vendor# for the PO:'. Skip to step 5.
4. Type the PO number and press <Enter>. You are prompted to 'Please Enter Vendor# for the PO:'.
5. Type the Vendor number and press <Enter>. You are asked to verify the Vendor number.
6. If the Vendor number is correct: Press <Enter> key.
To change the Vendor number: Press <n> and press <Enter>. You are prompted to 'Please Enter Vendor# for the PO:'. Repeat step 5 until you have Entered the correct Vendor number.
You are prompted to 'Please Enter purchase order type:'. (See Chapter 8 Ordering for a description of PO types).
7. Type the PO type and press <Enter>. You are prompted to 'Please Enter costing method for the PO:', and 'DE' is Entered by default. (See Chapter 8 Ordering for a description of costing methods).
8. If the costing method is DE (discount entry): Press <Enter>.
If the costing method is CE (cost entry): Type <ce> and press <Enter>.
You are asked whether you want to use the current date for the PO.
9. To accept the current date for the PO, press <Enter>. To change the date, type the new date <MM/DD/YY> and press <Enter>.
You are prompted to 'Please Enter the expected discount for the PO:'.
10. If you are expecting a blanket discount on the PO, press <Enter>. Otherwise, type the discount percentage (4 digits to accommodate a decimal point) and press <Enter>.
'Insert special order indicator?' is displayed, and 'N' is entered by default.
11. If you want every item on the PO to be marked as a Special Order, press <Enter>. Otherwise, press <y> and press <Enter>.
If the "Rec" field in the lower right corner of the screen displays a positive number, 'Use recommended order quantity?' is displayed, and 'Y' is Entered by default. Skip to step 12.
If the "Rec" field in the lower right corner displays zero or less, you are prompted to 'Please Enter the quantity to order:'. Skip to step 18.
12. If you want to use the recommended order quantity, press <Enter>. 'Insert special order indicator?' is displayed, and "N" is Entered by default. Skip to step 18.
Otherwise, press <n> and then press <Enter>. You are prompted to 'Please Enter the quantity to order:'. Skip to step 19.
13. If the "Rst Qty" field displays a positive number, 'Use Restock quantity?' is displayed, and 'Y' is entered by default.
If the "Rst Qty" displays zero or less, you are prompted to 'Please Enter the quantity to order:'. Skip to step 18.
14. If you want to use the restock quantity, press <Enter>. Insert 'Insert special order indicator?' is displayed, and 'N' is Entered by default. Skip to step 19.
If you do not want to use the restock quantity, press <n> and press <Enter>. You are prompted to 'Please Enter the quantity to order:'. Skip to step 18.
15. If the "Rec" field displays a positive number, 'Use Recommended order quantity?' is displayed, and 'Y' is Entered by default.
If the "Rec" displays zero or less, you are prompted to 'Please Enter the quantity to order:'. Skip to step 18.
16. If you want to use the recommended quantity, press <Enter>. Insert 'Insert special order indicator?' is displayed. Skip to step 19.
If you do not want to use the recommended quantity, press <n> and press <Enter>. and 'N' is Entered by default. You are prompted to 'Please Enter the quantity to order:'. Skip to step 18.
17. If you want to use the default quantity, press <Enter>. Insert 'Insert special order indicator?' is displayed, and 'N' is Entered by default. Skip to step 19.
If you do not want to use the default quantity, press <n> and press <Enter>. You are prompted to 'Please Enter the quantity to order:'. Skip to step 18.
18. Type the quantity that you want to order and press <Enter>. 'Insert special order indicator?' is displayed, and 'N' is Entered by default.
19. If you want this item to be marked as a Special Order, press <y> and press <Enter>.
Otherwise, press <Enter>. You are notified in the Message: box that the record has been added to the PO number that you created or specified in step 3.
The cursor is flashing in the Command: box.
20. Press <Enter>. The next record in the Sort Order is displayed.
Adding a Sorted Record to a Return Order
| Please Note You must have a sorted record displayed on the screen in order to add a sorted record to a Return Order. |
1. With the cursor flashing in the Command: box of a sorted record, press <r>. You are prompted to 'Please Enter Return# to add the sort record to:'.
If you created or specified a default Return Order for this sort, your default Return# is displayed. If you did not create a default Return Order for this sort, 'NEW' is Entered by default. Skip to step 3.
2. If you want to add the item to the default Return Order that you just created or specified, press <Enter>. Skip to step 3.
If you want to add the item to a different Return Order, you are prompted to 'Please Enter the quantity to return:', and the On Hand quantity is displayed.
Skip to step 13.
If the Return Quantity Type you selected is 'Recommended': Skip to step 11.
If the Return Quantity Type you selected is 'On Hand quantity':
If the PO Quantity Type you selected is 'User Entered', you are prompted to 'Please Enter the quantity to return:'. Skip to step 14.
3. If you want WordStock to assign a new Return Order#, type <new> and press <Enter>. You are prompted to 'Please Enter Vendor# for Return:". Skip to step 5.
If you want to assign a new Return Order #, type <art> and press <Enter>. You are prompted to 'Enter Return # to create:'.
If you want to add the items to an existing Return Order: Type the RO# and press <Enter>. You are prompted to 'Please Enter Vendor# for Return:". Skip to step 5.
4. Type the Return Order number and press <Enter>. You are prompted to 'Please Enter Vendor# for Return:".
5. Type the Vendor number and press <Enter>. You are asked to verify the Vendor number.
6. If the Vendor number is correct, press <Enter>. To change the Vendor number, press <n> and press <Enter>. You are prompted to 'Please enter Vendor# for Return:'. Repeat step 5 until you have entered the correct Vendor number. You are asked whether you want to use the current date for the Return Order.
7. To accept the current date for the Return Order, press <Enter>. To change the date, type the new date <MM/DD/YY> and press <Enter>
You are prompted to 'Please enter the expected discount for the RO:'.
8. If you know the Vendor's refund discount, type the discount percentage (4 digits to accommodate a decimal point) and press <Enter>. Otherwise, press <Enter>. You are asked whether you would like to 'Use delete record indicator for returns?', and 'Y' is Entered by default.
9. If you want to delete this item's Inventory record, press <Enter>. Otherwise, press <n> and press
<Enter>. If the "Rec" field in the lower right corner of the screen displays a negative number, 'Use recommended order quantity?' is displayed, and 'Y' is wntered by default. Skip to step 12.
If the "Rec" field in the lower right corner displays zero or more, you are prompted to 'Please Enter the quantity to return:'. Skip to step 14.
10. If you want to use the recommended supply quantity, press <Enter>. 'Insert 'delete record' indicator?' is displayed, and 'N' is Entered by default. Skip to step 15.
Otherwise, press <n> and press <Enter>. You are prompted to 'Please Enter the quantity to return:'. Skip to step 14.
11. If the "Rec" field displays a negative number, 'Use Recommended order quantity?' is displayed, and 'Y' is Entered by default. If the "Rec" displays zero or a positive number, you are prompted to 'Please Enter the quantity to return:'. Skip to step14.
12. If you want to use the recommended quantity, press <Enter>. Insert 'Insert 'delete record' indicator?' is displayed, and 'N' is entered by default. Skip to step 15.
If you do not want to use the recommended quantity, press <n> and press <Enter>. You are prompted to 'Please enter the quantity to return:'. Skip to step 14.
13. If you want to use the On Hand quantity, press <Enter>. Insert 'Insert 'delete record' indicator? 'is displayed, and 'N' is Entered by default. Skip to step 15.
If you do not want to use the On Hand quantity, press <n> and press <Enter>. You are prompted to 'Please Enter the quantity to return:'. Skip to step 14.
14. Type the number that you want to return and press <Enter>. 'Insert 'delete record' indicator?' is displayed, and 'N' is entered by default.
15. If you want to delete this item's Inventory record, press <y> and press <Enter>. Otherwise, press <Enter>. You are notified in the Message: box that the record has been added to the Return# number that you created or specified in step 3. The cursor is flashing in the Command: box.
16. Press <Enter>. The next record in the Sort Order is displayed.
The Basic Inventory Report
The Basic Inventory report provides an alphabetical layout of all of your Inventory records based on one of five fields. The Basic Inventory report is very simple to run; it is a pre-formatted report that can be run on any one of 5 fields in your Inventory records.
The Basic Inventory report is an easy way to access a broad overview of your inventory based on the Vendor, Product, Section, Imprint, or Comments field of your Inventory records.
1. Use the keyboard arrow method or the hot key method to select 'Reports' from the Main Menu. The Reports sub-menu is opened, and 'Sort a data file' is highlighted.
2. Select 'WS Reports sorted records'. The WS Reports sorted records sub-menu is opened, and 'Restocking' is highlighted.
3. Select 'Basic Inventory Report'. The PROGRAM TO SORT AND PRINT A BASIC INVENTORY REPORT is opened. You are notified that the Basic Inventory report can sort on the Vendor, Product, Section, comments, or imprint fields and asked 'Do you wish to continue?'.
4. Press <y> and press <Enter>. An Inventory fields Sort Include Specification menu box is opened, and you are prompted to 'Select an inventory field to sort on.' See Figure 723 below.
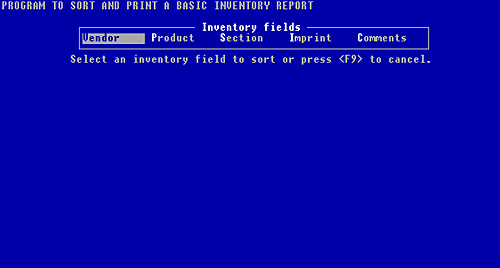
Figure 7-23, Inventory file fields available for creating
a Sort Include Specification for a Basic Inventory Report
5. Use the keyboard arrows to select a field on which to sort your Inventory records, and press <You are prompted to Enter something about the field you selected:
- If you selected 'Vendor', you are prompted to 'Enter a Vendor number'.
- If you selected 'Product', you are prompted to 'Enter a Product number'.
- If you selected 'Section', you are prompted to 'Enter a Section number'.
- If you selected 'Imprint', you are prompted to 'Enter an Imprint field pattern'.
- If you selected 'Comments', you are prompted to 'Enter a Comments field pattern'.
6. Enter the information for which you'd like to sort, and press <Enter>. You are prompted again to enter something about the field you selected
7. If you would like to sort your records based on more than one criteria, repeat step 6 until all of your desired criteria are entered. Press <q> and press <Enter> when you are done. Otherwise, press <q> and press <Enter>;
You have just created a simple Sort Include Specification. An Inventory fields Sort Order Specification menu box is displayed, and you are prompted to 'Select an inventory field to determine sort order. See Figure 724 below.
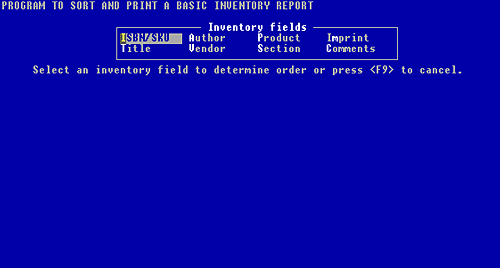
Figure 7-24, Inventory file fields available
for creating a Sort Order for a Basic Inventory Report
8. Select a field and press <Enter>. You are asked whether the field should be sorted in ascending order (alphabetically or numerically from lowest to highest ).
9. If you want the field to be sorted in ascending order, press <y> and press <Enter>. If you want the field to be sorted in descending order, press <n> and <Enter> key.
You are asked 'Do you wish to choose an additional field to determine report order?'.
10. If you want to choose another field to determine the report order, press <y> and press <Enter>. Repeat steps 8 amd 9. Press <n> when you are done. Otherwise, press <n> and press <Enter>.
You have just created a simple Sort Order Specification. You are prompted to 'Enter a name for this sort'.
11. Type a name for the sort (something relevantup to 50 characters, no spaces), and press <Enter>. You are notified that the Inventory file is being sorted. When the sort is done, the number of sorted records is displayed. You are prompted to 'Press <Enter> to proceed with viewing the report.'
12. Press <Enter>. A Viewing Methods Report Format menu box is opened, and you are prompted to 'Select a viewing method'. See Figure 725 below.

Figure 7-25, menu of options for viewing an Inventory Report
13. Use the keyboard arrows or the hot key method to select a viewing method:
Select 'Print a long inventory report' to print the entire contents of each Inventory records in the report. Skip to step 14.
Select 'Print a short inventory report' to print the Inventory records in the order you specified in step 9 according to one of your custom Report Formats (see page 723). Skip to step 16.
Select 'Look at sort output on screen' to view the Inventory records on the screen in the order you specified in step 9. You can then add some or all of the records to a PO or a Return Order. You are prompted to 'Enter # of weeks to recommend:' Follow steps 4 through 23 beginning on page 757.
14. If you selected 'Print a long inventory report':
If there is only one printer in your store, you are prompted to 'Enter a title for the report'. If there is more than one printer in your store, you are asked if you want to use your default printer.
Skip to step 18.
15. If you want to use your default printer, press <y> and press <Enter>. Otherwise, press <n> and press <Enter>. A Printers Menu box is opened. Use the keyboard arrows to select a printer and press <Enter>. You are prompted to 'Enter a title for the report. Skip to step 18.
16. If you selected 'Print a short inventory report': The PROGRAM TO SELECT AND PRINT A CUSTOM FORMAT REPORT is opened and a Reports format Menu box is opened, and you are prompted to 'Please select a custom report format'.
17. Use the keyboard arrow method to select a Report Format. You are prompted to 'Enter a title for the report:'
18. LONG INVENTORY REPORT SHORT INVENTORY REPORT
Type a title for the report (up to 30 characters) and press <Enter>. This is just a title for the printed report, and is not saved by WordStock.
If there is only one printer in your store, you are notified that the report is printing. If there is more than one printer in your store, a Printer Menu box is displayed. Select a printer and press <Enter>. When the printing is done, you are prompted to 'Press ENTER for additional viewing choices'.
19. Press <Enter>. If you would like to view the report in another format, repeat steps 1316.
Otherwise, press <F8>. You are notified that the 'Program is exiting' at your request. Press <Enter>. The Main Menu is displayed with the Reports and the Sorted records sub-menus opened.
Printing an Item List for a Customer
The program to print an item list for a customer is a pre-formatted report that prints a list of titles based on the customer's stated interest and provides a form which the customer can use to order any of the titles on the list. An Item List contains the ISBN/SKU, title, author, and price for each item on the report.
| Please Note You must have created a Sort Include Specification before printing an Item List for a customer. |
1. Use the keyboard arrow method or the hot key method to select 'Reports' from the Main Menu. The Reports sub-menu is opened, and 'Sort a data file' is highlighted.
2. Select 'WS Reports sorted records'. The WS Reports sorted records sub-menu is opened.
3. Select 'Item List For Customer. The PROGRAM TO PRINT AN ITEM LIST FOR CUSTOMER is opened and an Inventory Sort files menu box is displayed.
4. Use the keyboard arrows to select an inventory sort and press <Enter>. You are prompted to 'Enter the title for the report'.
5. Type a title for the report (up to 30 characters) and then press <Enter>. The title appears as a heading for the printout and is not saved by WordStock. You are prompted to 'Enter the number of copies to be printed'.
6. To print one copy of the report, press <Enter>. To print more than one copy of the report, type the number of copies that you want to print and press the<Enter> key. You are asked whether you would like to 'print an order form after the listing'.
7. If you want to print an order form: Press <y> and press <Enter>. If there is only one printer in your store: Your report is printed. If there is more than one printer in your store: You are asked if you want to use your default printer. If you do not want to print an order form: Press <n> and press <Enter>.
8. If you want to use your default printer: Press <y> and press <Enter>. Otherwise, press <n> and press the<Enter> key. A Printers Menu box is opened. Use the keyboard arrows to select a printer and press <Enter>.
A series of messages regarding the printing progress is displayed. When the printing is done, you are asked 'Did the report print okay?'
9. Check the report. If the report printed OK: Press <y> and press <Enter>.
Otherwise, press <n> and press <Enter>. You are prompted to 'Press <Enter> to return to the menu'. You are asked whether you would like to reprint the report.
Skip to step 11.
10. If you want to reprint the report: Press <y> and press <Enter>.
If you do not want to reprint the report: Press <n> and press <Enter>.
A series of messages regarding the printing progress is displayed. When the printing is done, you are asked whether the report printed okay. Repeat step 9 until the report prints OK.
You are prompted to 'Press <Enter> to return to the menu.
11. Press <Enter>. The Main Menu is displayed with the Reports and the Sorted records sub-menus opened.
Vendor, Product, Section, Special Order,
and Customer Reports
You can run a pre-formatted report which includes every record in your Vendor, Product, Section, Special Order or Customer file, or you can use one of your custom sorts to narrow your search.
Generating Reports Based on Custom Sorts
1. Use the keyboard arrow method or the hot key method to select 'Reports' from the Main Menu. The Reports sub-menu is opened, and 'Sort a data file' is highlighted.
2. Select 'WS Reports sorted records'. The WS Reports sorted records sub-menu is opened.
3. Select 'Vendor, Product ,Section, Special Order, or Customer.
Depending upon the file you selected, the PROGRAM TO PRINT A FULL (VENDOR, PRODUCT, SECTION, SPECIAL ORDER, or CUSTOMER) FILE REPORT is opened.
4. If you selected 'Customer': A Customer Report Formats menu box is displayed, and you are prompted to 'Select a customer report format'.
If you selected 'Vendor', 'Product', 'Section' or 'Special Order: Skip to step 7.
5. If you want to print the entire contents of each record in the report: Select 'Long format'. Skip to step 7.
If you want to print the records according to one of your custom Report Formats: Select 'Short format'. Your customer sort files menu box is opened.
6. Select a Customer file sort output. THE PROGRAM TO PRINT A CUSTOMER FILE- SHORT IS OPENED.
7. If there is more than one printer in your store: You are asked whether you want to send the report to your default printer.
8. If you want to send the report to your default printer: Press <y> and press <Enter>. Otherwise, the report is printed based on the most recent sort specifications.
Otherwise, press <n> and press <Enter>. A pop-up menu of your printers is displayed. Use the keyboard arrows to select a printer and press <Enter>
The report is printed based on your most recently created sort specifications.
Generating Reports Based on
All Records in Your Data Files
Reports based on all records in your data files present information about every record in the data file you select (Product, Section, Vendor, Special Order, or Customer.
We recommend that you generate a full Section and Product report every month so that you have a snapshot of your store for merchandising strategy and to build a history of Product and Section trends.
Full reports on your other data files are not as useful for merchandising.
1. Use the keyboard arrow method or the hot key method to select 'Reports' from the Main Menu. The Reports sub-menu is opened, and 'Sort a data file' is highlighted.
2. Select 'WS Reports all records'. The WS Reports sorted records sub-menu is opened.
3. Select 'All Vendors', 'All Products' ,'All Sections', 'All Special Orders', or 'All Customers'. Depending upon the file you selected, the PROGRAM TO PRINT A FULL (VENDOR, PRODUCT, SECTION, SPECIAL ORDER, or CUSTOMER) FILE REPORT is opened.
4. Make sure that your printer is 'on' and that it is loaded with paper. If there is more than one printer in your store: You are asked whether you want to send the report to your default printer. Otherwise: The report is printed based on the most recent sort specifications.
5. If you want to send the report to your default printer: Press <y> and press <Enter> Otherwise, press <n> and press <Enter>. A pop-up menu of your printers is displayed. Use the keyboard arrows to select a printer and press <Enter> The report of all records in the data file is printed
The Cost of Inventory Report
The Cost of Inventory Report provides a approximate estimate of the value of your On Hand inventory as well as the approximate cost of your On Order quantities.
WordStock will process a Cost of Inventory report in one of two ways depending on whether you choose to calculate costs based on the "Price 1" or the "Price 2" field of your Inventory records.
To have the Cost of Inventory report based on the "Price 2" field of your Inventory records, your system must be configured to automatically enter the last receiving cost for the corresponding item. Please call WordStock Support for more information on this option.
Generating a Cost of Inventory Report
To increase the accuracy of your Cost of Inventory Report, we recommend that you:
Clear all negative numbers from the On Hand and On Order fields of all your Inventory records.
Clear all On Hand and On Order quantities from XISBNs 120.
1. Use the keyboard arrow method or the hot key method to select 'Reports' from the Main Menu.
The Reports sub-menu is opened, and 'Sort a data file' is highlighted.
2. Select 'WS Reports all records'. The WS Reports all records sub-menu is opened.
3. Select 'Cost of Inventory Report'.
The PROGRAM TO CALUCULATE A COSTING SUMMARY OF THE INVENTORY FILE is opened and you are prompted to 'Enter the month to calculate:'.
4. If you want to run the report for the current month: Press <0> and press <Enter>.
If you want to run the report for a month other than the current month: Press the number that corresponds to the month you want to report on (<1> for January, etc.) and press <Enter>.
You are asked whether you want to use your default discount percentage, and 'Y' is Entered by default.
5. If you want to use your default discount percentage: Press <Enter>.
If you want to use a different discount percentage: Press <n> and press <Enter>. You are prompted to Enter the default discount percentage to use. Type the discount percentage (four digits to accommodate a decimal point) and press <Enter>.
| Important You are notified that your records are being processed. When the processing is done, the number of records that were processed is displayed, you are asked whether you are 'Ready to print the summary report?', and 'Y' is Entered by default. |
6. If you want to print the report: Press <Enter>.
If you do not want to print the report: Press <n> and press <Enter>. You are informed that you will have to run the program from the beginning again, and asked whether that is OK. Press <y> and press <Enter>. You are prompted to 'Press <Enter> to return to the menu. Skip to step 9.
7. If there is more than one printer in your store: A pop-up menu of your printers is displayed. Use the keyboard arrows to select a printer and press <Enter>.
If there is only one printer in your store: After a brief delay, you are notified that the printing is compete, prompted to 'Make sure now that the report printed OK', and asked 'Do you want to print the report again?', and 'Y' is Entered by default.
8. Check that the report printed OK. If you want to print the report again: Press <y> and press <Enter>. If you do not want to print the report again: Press <n> and press <Enter>.
After a brief delay, you are notified that the printing is compete, and asked whether you want to print the report again.
Repeat step 8 until you have printed all the copies you want. You are prompted to 'Press <Enter> to return to the menu.
9. Press <Enter>.
The Main Menu is displayed with the Reports and the all records sub-menus opened.
|
|||||||||||||||||||||||||||